- Custom Quilts by Stephanie Soebbing
- Quilting Cat Lady (we are both empty nesters!)
- Patchwork is beautiful (Turkish language, but beautiful pictures - can't tell what's painting and what's quilt)
- Claudias blog (German language, gorgeous quilts)
- Linda's Joy of quilting
- Megan's quilts
- One happy hooker quilts and crochet
- Quilters Crossing love the colors!
- Stitcharella German and English and blue blue blue!
- A Mild Season scrappy, thrifty, quilty
Thursday, July 29, 2010
Link-o-rama: Other quilty blogs to look at
When I joined Quilting Gallery, they posted a link to my blog. At the same time, they showed links to the blogs of other new members. Here are a few of the interesting links:
Wednesday, July 28, 2010
Quilting Gallery - a great way to share your blog!

I just joined the Quilting Gallery, which is a web with a number of links to other quilters. They even have special features like "Share-It Tuesdays" in which you submit link to a recent blog post of yours, showin what you're working on.
Here's the general link to Quilting Gallery: http://quiltinggallery.com/ and
here's a link to this week's Share-It Tuesday.
Monday, July 26, 2010
The back of my GFG
My Grandmother's Flower Garden (GFG) quilt is my pride and joy. It's completely hand-pieced and I'm hand quilting it now. The reason I made it is to honor my grandmother, Gertrude Alice Borders Cole, who taught me my first quilting stitches. She made all of her quilts by hand, with templates rather than paper piecing, never using a quilt frame. She made at least one crazy quilt, which I wore to pieces, a double wedding ring, a bowtie, a flower garden, and more. Many quilts were made using her old dresses, as we had nothing to waste.
I pieced my top with just over 1000 pieces, and it went quite quickly. When it came to the backing, I wanted something modern, with plenty of color. Kaffe Fassett Roman Glass fit the bill, even though I'd never in my life deliberately chosen orange for anything.
Here are some pictures of the quilt in progress. I'm quilting it by straight lines through the flowers, making giant hexagon shapes, and doing a traditional path border in the green. Now that the weather has cooled off a bit here in Germany, I can actually stand to have it on my lap and work on it.


Sunday, July 25, 2010
Squeezing quilty goodness into sewing projects
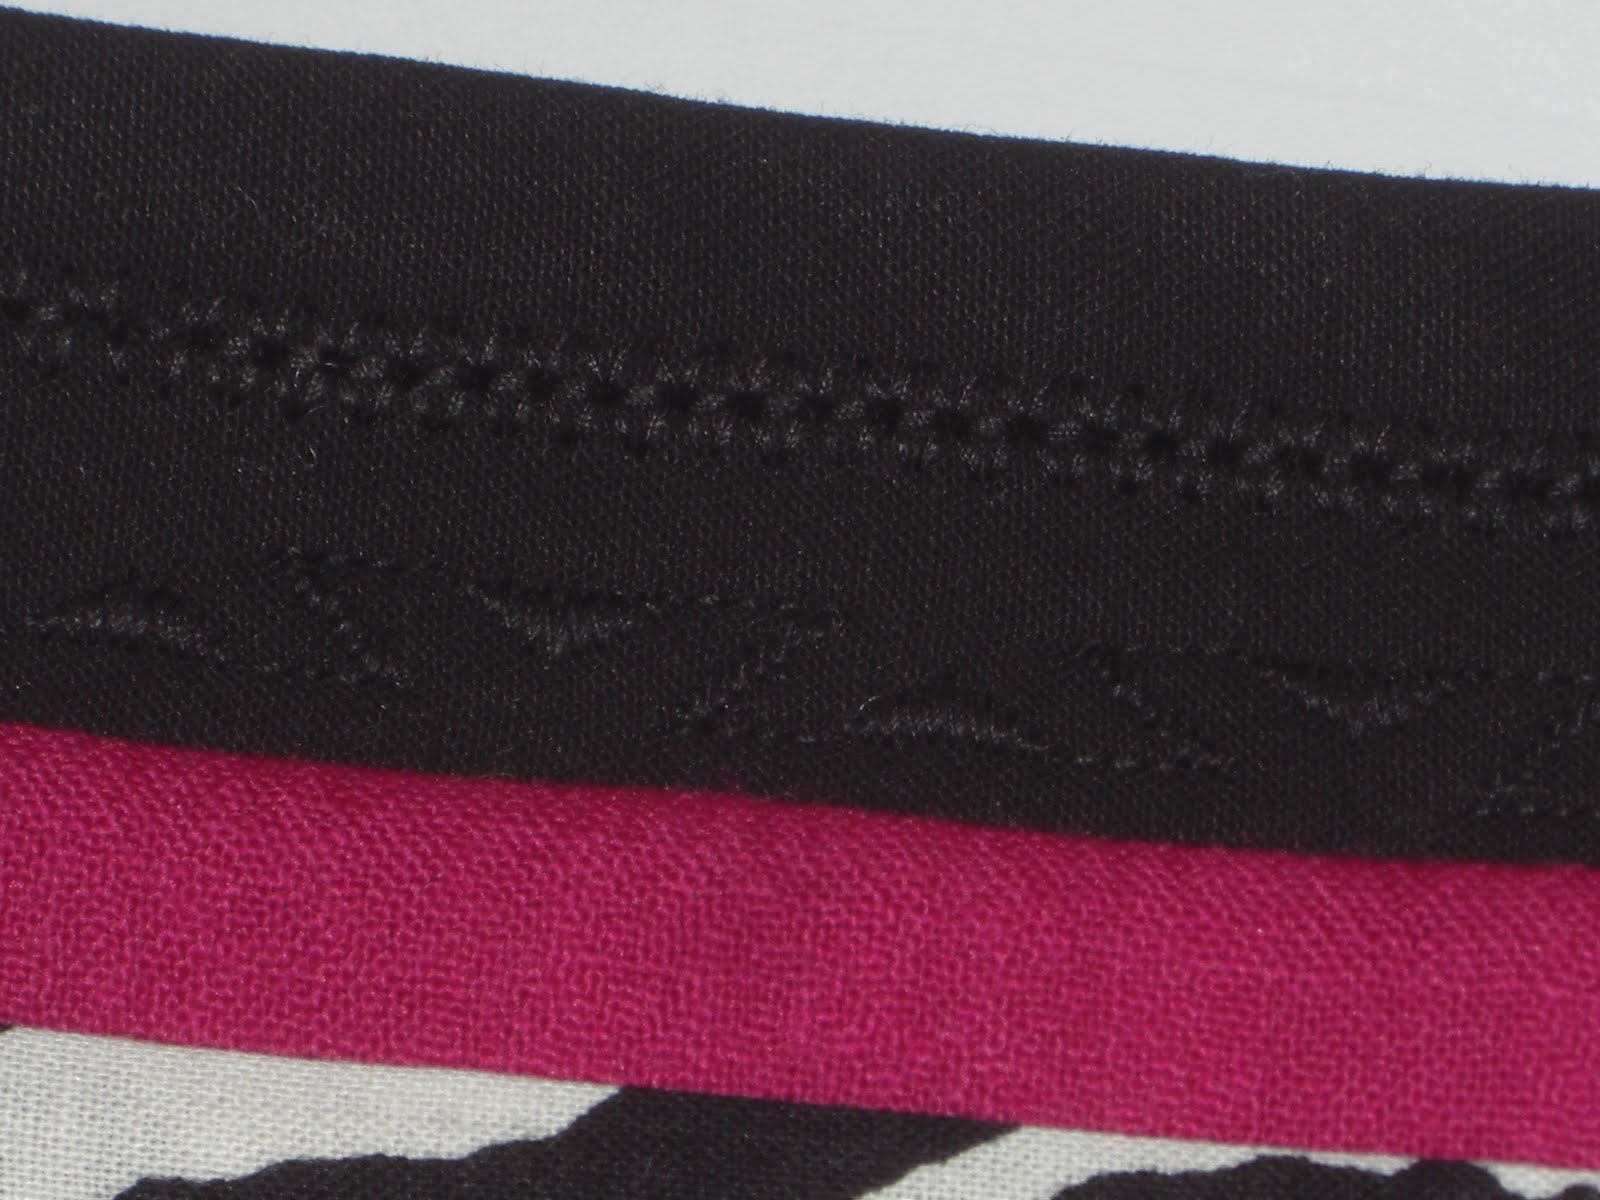
Dear Daughter needed a curtain to cover a doorway, and wished for one that had black on one side, and zebra on the other. Easily done, and you might recall the buttonholes I made with my nifty 440QE. They can also be seen in the pics below. The chalk mark you might be able to see will be on the inside when the curtains are hanging, so no need to remove them.
Today I finished a tie-back, so she can pull the curtain away from the door when she wants. I managed to add a little quilting with decorative stitching to the tie-back, even though it needed to be black-on-black.
Here are some pictures, but don't look too closely or you'll see just how much I need to improve my alignment ability of multiple stitch rows. I used the 440 stitches number 128 and 147. Check out the closeups below.


An embarrassment of riches
At our quilt guild meeting last night, I did something I'd never done before - I won the BOM! We have 2 BOMs at each meeting, and I'd never even won one before. But last night I won both the Beginners and the Advanced block sets. I was overwhelmed and thrilled.
Now the reality has set in - what shall I do with these beauties? One set is a flower, and there are 6 or 7 of those 10 inch blocks. The other set is a scrappy green block, and there are about a dozen of them. I'm thinking that I will split the scrappy green ones, and use them as a border around the flowers. I may add a flower block or two, depending on layout. What do you think?
But it needs something more, so I'm thinking about adding some flying geese to the mix, maybe as sashing, or as another border. I am so looking forward to seeing what this becomes - it will be my first scrappy quilt.


Tuesday, July 20, 2010
Quilted postcard - first one
This was a lot of fun, figuring out how to make a postcard from fabric. I just took scraps and an idea in my head, and went to work. This is what appeared.
I pieced the tree with some white fabric, then appliqued the bird on top. Finally I finished by stitching the word Thanks on my Bernina and ironed it on.
I'll do more postcards, it was so easy and simple to be creative.

I pieced the tree with some white fabric, then appliqued the bird on top. Finally I finished by stitching the word Thanks on my Bernina and ironed it on.
I'll do more postcards, it was so easy and simple to be creative.

Stitch Sampler - a long drink of water

I have been using a Bernina 440QE for several months now, and I LOVE it. It makes so many things easier than I ever imagined. For example, I just sewed a tabbed curtain for my dear daughter, and dear Hubby said I should sew buttonholes and buttons, rather than just sew both ends of the tabs to the curtain. I went into autoimmune mode, not able to imagine sewing 30 buttonholes on the 10 tabs.
When I got to the machine, and started thinking about it, though, it occurred to me that maybe the Bernina (her name is Gertrude Alice) could do buttonholes more easily than I was used to. So I took the time to learn how to do buttonholes with my nifty automatic buttonhole foot.
It was like magic! I measured the button, then sewed the first side of the buttonhole. Then I pressed the reverse button, and the machine stitched the rest of the buttonhole for me!
THEN I learned that I only needed to press the "Add to memory" button, and it would be ready to go at that exact size. Well that also worked perfectly, and my 20 (didn't need the last 10) buttonholes just flew onto the fabric. I was very impressed.
Anyway, that story has nothing to do with the picture. Early last spring, I decided to stitch out every one of the 181 stitches the QE440 has. I chose to do it on both black and white, and I chose to test out several different embroidery threads.
Daughter is holding the full thing, all 2 meters of it (she is over 175 cm herself), and here are some closeups as well. I've hung the finished piece up in my sewing room so I always have a reference to choose stitches.


Sunday, July 18, 2010
The big move
After 19 years, we are empty nesters. She moved up to go to school, but was so excited to go that she moved in July, even though school starts in October.
We packed and loaded on a 30+ day, then drive 5 hours in a van without air conditioning. Luckily the rest of the moving days were much cooler.
Here are some pictures of the new apartment, in the middle of moving stress.


We packed and loaded on a 30+ day, then drive 5 hours in a van without air conditioning. Luckily the rest of the moving days were much cooler.
Here are some pictures of the new apartment, in the middle of moving stress.


Subscribe to:
Posts (Atom)